
New Front Tire
A Friday afternoon call to CycleGear confirmed availability of a Pilot Road front in the correct size. Saturday morning I came downstairs ready to get greasy.
Dad helped me get the bike up on stands before I sat down to reread the front wheel removal procedure in my owners manual. Next I started to lay out my tools within reach of the front of the bike.
The "quick release" front axle on new BMW boxers requires a special tool. It's basically a 22mm nut welded to a smaller nut. Some owners buy the tool at a premium from BMW. The hardcore weld up their own. I went to CycleGear and bought a generic Motrax-brand version of it for $12.
Of course, that particular trip to CycleGear happened back in June. I'd been planning on pulling my wheels back then for my first tire replacements, but ended up just bringing the whole bike into the dealer because I didn't have any BSG's available to help me (should I require it) that weekend. The axle-removal tool was carefully placed somewhere "safe".
Famous last words?
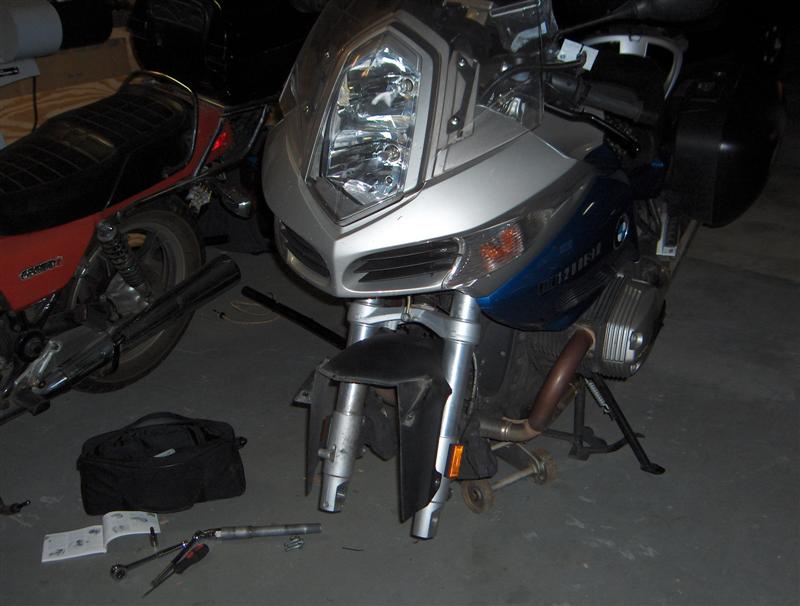
Yeah. So a couple of Saturday morning hours were whiled away searching for that "safe" place. After a whack to the forehead when I found it rattling around in the bottom of my gear closet, I sat down and regarded the distinctive proboscis of my R1200ST.
Steps to front wheel removal:
1: Remove the painted part of the front fender (4 fairing screws)
2: Remove brake calipers and let them dangle (2 screws each side)
3: Remove axle pinch bolt (1 screw)
4: Use special tool to remove axle
Easy cheesy, eh? Before going back inside, I washed my hands at the garage utility sink. Note to Self: don't forget the latex gloves next time you play with dusty brake system parts. Orange Gojo is your friend.
After all this, I didn't end up making it to CycleGear for the tire mounting that day. Breakfast called, then I wasted time surfing the internet and going out to take advantage of a local nursery's 70% off houseplants sale. (I bought $50 worth of plants for $16!)
I dropped the wheel off on Sunday afternoon and then picked it up during lunch on Monday.
Reinstallation on Monday night was easy. I remembered the latex gloves this time.
1: Support wheel on feet while working the axle through.
2: Use special tool connected to torque wrench and torque it down.
3: Torque pinch bolt
4: Reinstall brake calipers. Torque them.
5: Reinstall painted fender.
6: Turn on bike (to engage the servo brakes) and pump lever a couple of times.
7: Clean up, loosen torque wrench and drop special tool into tool bag
I picked my sister Amy up from the airport after work Tuesday, so the bike hasn't been off the stand yet. I've got a lot of route planning and packing to do before departing from work for Arkansas on Thursday night...


No comments:
Post a Comment